

All artworks by Ryepress - Colin Bailey
Nudes • 1 artwork
View all
Oil on Canvas Nudes 24 inches x 36

Rye • 10 artworks
View all
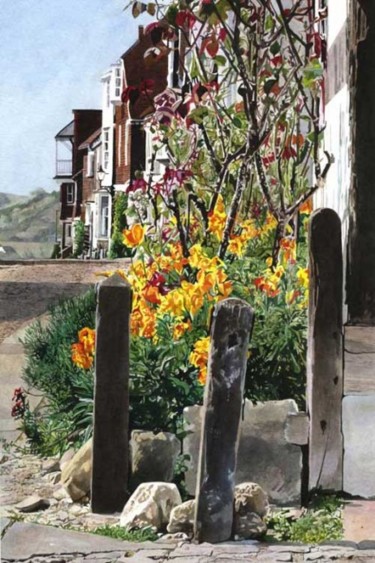
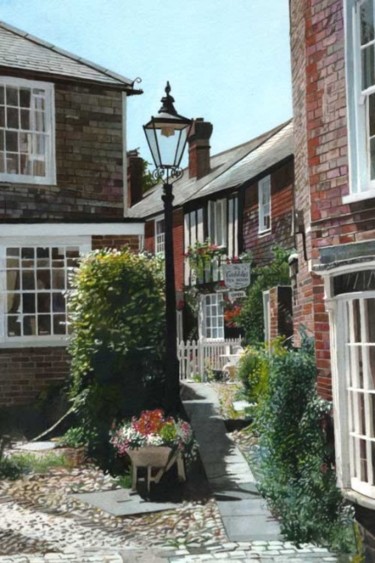
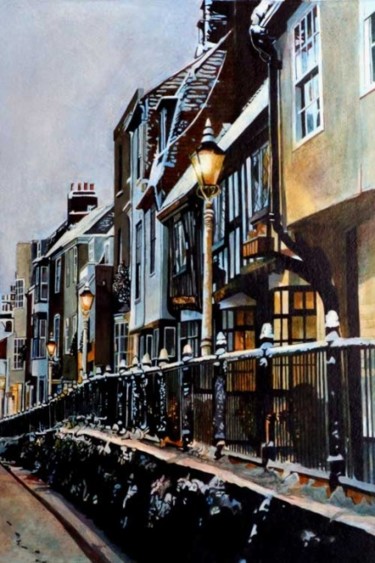
Rye is a small hill top town and in East Sussex, England, on the River Rother, and at the western edge[...]
Rye is a small hill top town and in East Sussex, England, on the River Rother, and at the western edge of the Walland Marsh, part of the Romney Marshes. Notable buildings in the town include St Mary's church, the Ypres Tower (pronounced "wipers"), Lamb House the Mermaid Inn and many of the houses on Mermaid Street, Watchbell Street, and Church Square.


Hastings • 18 artworks
View all
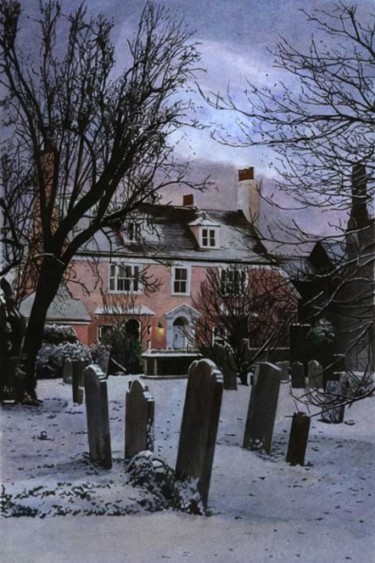
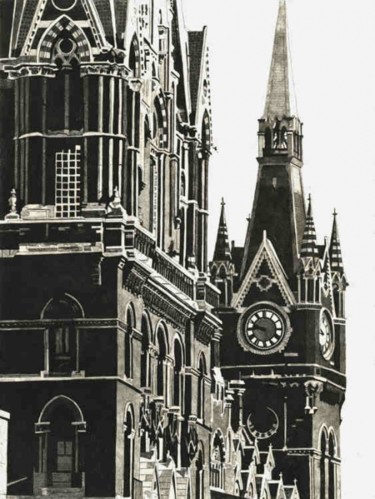
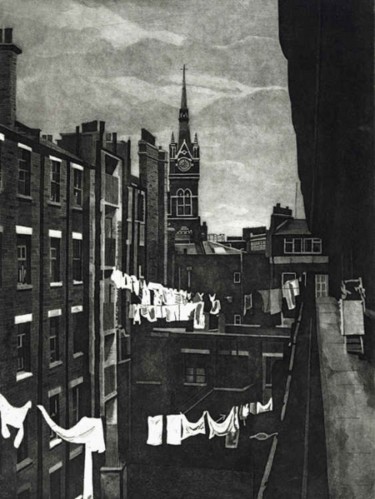
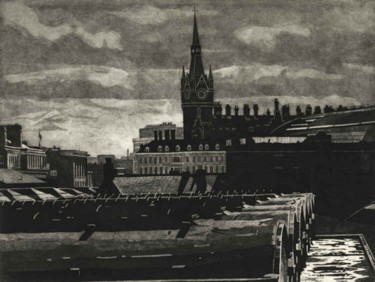
Hastings Old Town. Hastings is best known for its connection with the Battle of Hastings in 1066 which[...]
Hastings Old Town. Hastings is best known for its connection with the Battle of Hastings in 1066 which actually occurred north of the town at Senlac Hill in Battle. Hastings was one of the Cinque ports, It still has the largest beach-based fishing fleet in England.


Recognition
No data available yet
Biography
Colin Bailey is an artist/printmaker living and working in Hastings, East Sussex after living in Rye for ten years and Kings Cross, London for fifteen years. Originally an etcher, and still with a printmaker’s instinct for multiple images, he has embraced the advance of recent technology through the use of digital photography, high resolution scanning and archival quality giclée printing.
Whilst in Rye he recognised the potential of the internet and registered as a showcase for his then mainly Rye based etchings. Now in Hastings, he works on a growing series of paintings which he scans and issues as limited edition giclée prints, handling this whole process himself in order to maintain artistic integrity.
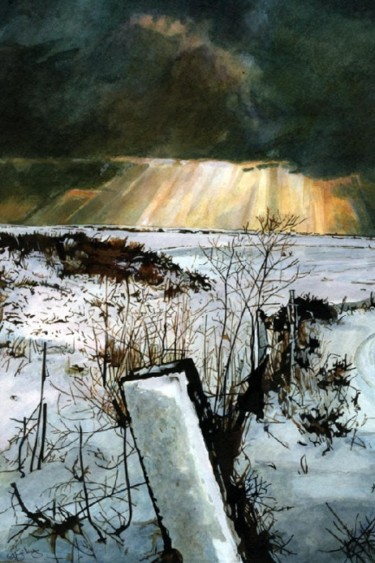
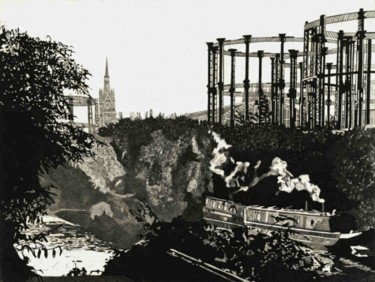
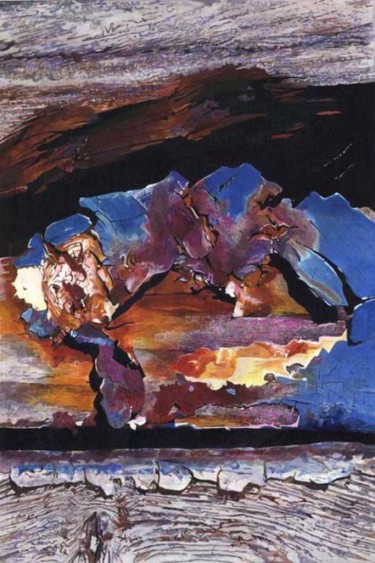
As well as traditional views of Rye & Hastings, there is now a section of work exploring the textures and structures of Rye Bay (the East Sussex coast between Hastings and Dungeness). Ancient groynes, banks of constantly shifting shingle, fishing boats drying on the beach, and the prehistoric coast at the foot of the cliffs at Rock-a-Nore are examined in paintings with an almost abstract scale and attention to detail. Close-up and often ambiguous, these images of peeling, faded paintwork, rusting metal and cracked, bleached wood chart the results of man-made and natural structures slowly breaking up through the relentless onslaught of rain, wind, sun, sea, sand and time.
Colin Bailey exhibits frequently in various venues in Rye & Hastings.
-
Nationality:
UNITED KINGDOM

- Date of birth : 1957
- Artistic domains:
- Groups: Contemporary British Artists
Influences
No data available yet
Education
No data available yet
Artist value certified
No data available yet
Achievements
No data available yet
Activity on Artmajeur
Last modification date : Mar 11, 2012
(Member since 2007)
Image views: 16,065
Artworks by Ryepress - Colin Bailey added to favorite collections: 3
Latest News
All the latest news from contemporary artist Ryepress - Colin Bailey
Added Nov 7, 2007
- Colin Bailey
Colin Bailey is an artist/printmaker living and working in Hastings, East Sussex after living in Rye for ten years and Kings Cross, London for fifteen years. Originally an etcher, and still with a printmaker’s instinct for multiple images, he has embraced the advance of recent technology through the use of digital photography, high resolution scanning and archival quality giclée printing.
Whilst in Rye he recognised the potential of the internet and registered as a showcase for his then mainly Rye based etchings. Now in Hastings, he works on a growing series of paintings which he scans and issues as limited edition giclée prints, handling this whole process himself in order to maintain artistic integrity.
As well as traditional views of Rye & Hastings, there is now a section of work exploring the textures and structures of Rye Bay (the East Sussex coast between Hastings and Dungeness). Ancient groynes, banks of constantly shifting shingle, fishing boats drying on the beach, and the prehistoric coast at the foot of the cliffs at Rock-a-Nore are examined in paintings with an almost abstract scale and attention to detail. Close-up and often ambiguous, these images of peeling, faded paintwork, rusting metal and cracked, bleached wood chart the results of man-made and natural structures slowly breaking up through the relentless onslaught of rain, wind, sun, sea, sand and time.
Colin Bailey exhibits frequently in various venues in Rye & Hastings.

Added Nov 7, 2007
Etching on Copper plate
History
The techniques of etching and engraving are believed to have originated in Medieval times as a means of decorating armour and metal. The incised lines would have often been filled to darken them and from this it would have been a short step to transferring the image to cloth or paper. One suggestion is knights falling on soft ground would have left an impression of the patterns on their armour.
Etching differs from engraving mainly in that acid does the work of removing the metal. This allows a fluidity of mark and in the hands of an expert a almost infinite degree of control; The depth of each line can be controlled by the acid and so can hold as much or as little ink as is required to achieve the desired tone. Most metals can be used for the etching plate although the most common are Zinc and copper. Zinc is often used as a starter metal for students as it is relatively cheap and easy to work. Copper is much denser and less “brittle” and will yield more prints. It can also be steel-faced to last almost indefinitely.
The two etching techniques I employ are Hard Ground (the most basic form of etching) and Soft Ground. I rarely use aquatint- a process I will nevertheless explain later. The techniques I describe here are traditional methods adapted and modified to a modern domestic environment. Virtually everything apart from the printing can be done at home with suitable care and little space. The Modern table top press is now capable of printing etchings that match those done on heavy studio press (at least for small plates) and so there is now no reason why even the printing cannot be done at home!
Preparing the plate
I use 16 gauge copper plate (1/16th inch) which comes in 500mm x 1000mm sheets polished on one side and covered with a plastic protective sheet. This I cut up (very carefully!) by scoring into it over 50 times with a heavy craft knife and then snapping it away. This may sound a little brutal but I have not had a lot of luck with guillotined plates - however sharp the blade there nearly always seems to be a slight bending or compression of the metal which is almost impossible to straighten and which causes the prints to fade away at that edge. Most of us don’t have a heavy duty guillotine lying around the house and trusting this to others can result in scratches and plates that vary in size and are not perfectly square. I have experimented with three plate colour etchings in the past and this can make the plates difficult to register. Before removing the plastic coating I roughly bevel the edges of the plate to a 45° angle using a coarse file. This is optional but I find it much easier to roll the plate - with less chance of the roller catching the edge. When the print is finally ready to edition I finish off this bevelling with fine sandpaper and polish it up with the back of a spoon which gives a sharp clean print mark that does not cut the paper. Bevelling the plate before printing is compulsory in any class I teach! I have seen too many expensive blankets sliced through by the edge of an un-bevelled plate.
After removing the plastic coating I clean the adhesive residue off with white spirit and check for scratches. If the copper plate has tarnished I polish it with Brasso.
Before laying the ground on I degrease the plate. Traditionally this would have been ammonia and chalk but in a domestic situation washing powder works as a substitute (be careful of the particularly gritty ones!). Cream cleaners such as Jif (Now unfortunately renamed Cif!) used to be perfect as they contained ammonia but in our health and safety conscious times this has been changed and they just don’t work as well.
For heating the plate I use an ordinary domestic cooker (Gas is better, but with a bit of practice an electric ring is just as good. Manoeuvre the plate with a metal spatula so it is heated evenly and place it on a flat smooth heat resistant surface (this will get ground on it so check it can be cleaned with white spirit!)
Hard Ground
If you have used the roller recently and it has been kept wrapped in a plastic bag you will probably have enough ground already on the roller. Otherwise draw on the hot plate with the ball of hard ground - about enough to sign your initials 1 inch high is usually enough for medium size plate. The ball should skid across the plate without dragging. Roll the ground until it is even and the plate looks as though it has been coated with golden syrup (thicker than this and it will chip or make finer lines bite unevenly. You may well need to re-heat and re-roll the plate several times. Use the roller in a swooping motion in one direction to pick up the ground, and backwards and forwards to load more ground on to the plate. As the ground cools it will become sticky and hard to keep even. When reheating the plate be careful to remove it just as the ground starts smoking as further heating will cause the ground to scorch and become porous to the acid.
Obviously having a ground the colour of Golden syrup an a copper plate is not going to be that easy to draw on! The ground will be a matt non reflective finish when cooled and the copper will be shiny but I would still advise smoking the plate.
Smoking the plate
This involves clamping the plate on one edge with a pair of swan necked adjustable pliers (protect the surface of the plate with a small piece of folded card) and holding it above your head with the grounded surface facing down. This should be done before the plate has cooled entirely. Gently smoke the ground with a burning bundle of tapers (about 10 bound spirally from the bottom with masking tape) so that the carbon softens the wax and is absorbed into it. Start further away from the plate and as the ground starts appearing shiny brush the tip of the flame (about an inch above the visible flame) across the plate in a systematic pattern. This will take a bit of practice but the plate should cool to a uniform semi mat finish. I harden the wax at this point by running it under a cold tap. Any powdery carbon on the surface can be gently rubbed away with an orange polishing duster. Examine carefully for any specks of copper showing through as THESE WILL BE BITTEN!
The surface can now be drawn on using a variety of instruments. I have used an old dart with a pencil screwed into the barrel and presently use a sewing needle threaded through a propelling pencil instead of leads!
When the plate is immersed into acid* the exposed areas are bitten and when the wax is removed the drawn image is revealed as having been “etched” into the plate. The plate can then be inked up with ink being driven into the etched lines. The plate is then wiped in order to remove the ink from the surface. A sheet of dampened paper is placed over the inked plate and both are rolled through a press under high pressure The rolling action and the pressure cause the ink to be squeezed out and sucked out on to the paper. The resulting image is characterised by extremely fine line and subtle tones.
Successive biting to different depths can be precisely controlled with experience to create an infinite number of tonal variations.
*I use Dutch mordant: which is composed as follows: Hydrochloric, 200 grammes; chlorate of potash, 20 grammes; water, 880 grammes. This acid works slowly and evenly without undercutting the lines and without losing its strength as it bites. Nitric acid is more vigorous, but can cause deep lines to merge
Soft Ground
A copper plate is covered thinly with soft-ground; a non drying wax which is resistant to acid. Any textured object pressed onto the wax will pull the wax off when removed and leave an approximation of its texture. Placing paper over the plate and drawing on it will therefore create textures echoing pencil marks and some degree of “shading” can be achieved. The plate can then be immersed in acid and bitten and then printed.
ACID
The scariest part of etching is undoubtedly the acid! Endless films featuring bubbling, steaming bottles and beakers brandished by babbling mad scientists has given acid a bad image. YES! it is dangerous and should definitely be handled with care, especially at the mixing stage. NEVER add water to acid to dilute it - it will heat rapidly, probably spit and possibly explode. ALWAYS dilute acid by adding it slowly to cold water and ALWAYS in a well ventilated room with running water at hand in case of spills.
Nitric acid, which when diluted 1 part acid to 7 parts water gives a perfectly adequate bath for either copper or zinc ( do not use for both as the fumes can be dangerous) is a fast working solution, ideal for beginners, classes and experimental work. It bites vigorously and aggressively and can quickly lose its potency. It also tends to undercut and move sideways making close fine lines and hatching difficult to bite deeply. It tires quickly and timing can be difficult.
Dutch Mordant is an ideal mixture for Copper and can be used for zinc. It bites evenly and slowly, straight down and is very controllable. It slowly turns a bright turquoise with successive use and this can be accurately used to gauge its age and therefore strength.
Ferric Chloride is used for copper. This bizarre solution is, I believe, more of a salt than an acid (I'm actually not too hot on the chemistry of all this!). Looking suspiciously like Worcester sauce it corrodes the plate, leaving a sediment which can impede its action on fine lines unless the plate is suspended upside down in the solution. It will stain anything it comes in contact with a rusty yellow and a few unnoticed spills can reduce anything metal to a crumbly biscuit texture in a frighteningly short time (I have lost a metal bath this way!)
Biting Times
This is the area where the experience bit kicks in. How long should you leave a plate in the acid? The only real way of finding out whether a plate has been properly bitten is actually to clean it off and print it! I have seen many students ruin days of elaborate drawing by removing the plates too early and discovering their etching is a mere spidery faint ghost of what they wanted, or too late and finding that the subtly rendered tones they were hoping for have merged into one muddy, turgid black mess. Overbiting a plate will not just simply make it darker; in some cases fine, close hatching will merge and the resulting open area will have no texture to hold the ink - resulting in pale dusty looking "bald" areas with hard black edges.
How quickly, and deeply the acid bites is a matrix of several different variables:
Age of the acid - Fresh acid will have a relatively aggressive initial phase. Older acid will have a more sustained but slower bite
Room temperature - Acid reacts quicker the warmer it is and in doing so will heat up even more. Allow anything up to 25% longer for cold acid.
Area of metal exposed - An evenly distributed and elaborate drawing will bite quicker and more evenly than a drawing with heavily worked areas and large unexposed areas; the acid will also be "attracted" to the heavily worked areas in preference to individual lines or details.
How long the plate has been worked on - No-one works in a sterile environment and so the older exposed lines will have been in contact with the air for longer. They will have oxidised or have attracted grease from the air or hand. This will mean recently drawn areas will bite quicker and deeper. A solution of vinegar and salt carefully dabbed over the plate with a cotton wool ball will freshen the older lines somewhat.
A formula for achieving an set number of evenly spaced tones:
I used to have a spreadsheet which I am currently trying to resurrect which worked out the exact timings for an adjustable number of tones. I will make it available eventually! (I am presently trying to convert it from my old Psion 3a to Excel.... aaargh!!)
In the meantime here is the timing I generally use. In principal it adopts the same mathematical progression as camera shutter speeds or f stops.
SOFT GROUND stages
1 Initial sketch with simple tones
SOFT GROUND, Dutch Mordant on Copper
30 minutes and remove ground
2 Secondary drawing with shadows and more detailed mid tones :
SOFT GROUND, Dutch Mordant on Copper -
1 hour and remove ground
Apply coating of hard ground, smoke and do not remove between bites.
HARD GROUND Stages
Dutch Mordant on Copper working from darkest black downwards:
1 First Bite Black - 2 Hr (Total 4 Hr)
2 Then: Darker shadows - 1 hr (Total 2 Hr)
3 Shadows - 30 min (Total 1 Hr)
4 Mid - 15 min (Total 30 min)
5 Light - 8 min (Total 15 min)
6 Light 4 min (Total 8 min)
7 Lightest 4 min (Total 4 min)
8 White
Giving a total of 8 tones including White with a total of 4 Hours biting time
Each tone is double/half the time of the next
Hatching can be "interlaced" to create intermediate tones
Whilst the initial bite and lightest bites may seem extremely separated, remember that as you complete each successive tone, more and more of the plate is exposed, effectively accelerating the action of the acid.
Please see for further information

Reviews and comments

???? Trop puissant!
J'ai cru un moment que c'était des photos...Quel maîtrise!
Merci de nous offrir ces oeuvre au regard

Excellent work. Great eye for composition and control of technique. Mis saludos. My other artist friends and I have voted to bump you up to 'recognized master'.
Contact Ryepress - Colin Bailey
Send a private message to Ryepress - Colin Bailey